From Faded to Flawless: How to Refinish a Wine Barrel Like a Pro
There’s something deeply satisfying about taking an old, faded wine barrel and bringing it back to life. You know the kind—cracked a little from the sun, maybe a bit gray around the edges, the hoops starting to rust just enough to tell you it’s been somewhere. It’s got history, stories soaked into every inch of that oak.
When I see a tired barrel, I don’t see junk. I see potential. That’s part of the magic of reclaimed oak furniture—it’s lived a life already, and you get to give it another one.
Whether you’re turning it into a barrel coffee table, a patio bar, or just polishing it up for display, this guide will show you how to refinish your wine barrel the right way—without losing an ounce of its soul.
Why Old Barrels Are Worth Saving
Let’s be honest—new oak furniture is nice. But aged oak? That’s something else entirely. It has this personality, this quiet depth. Every nick, every stain, every mark from a winery floor adds to its charm.
The trouble is, once a barrel leaves the winery, it starts fighting a new kind of battle—sunlight, dry air, weather. The finish fades, the wood dries, and suddenly that beautiful vintage piece starts looking more “barn find” than “wine lounge.”
That’s where refinishing comes in. You’re not trying to erase its history—you’re trying to highlight it. You’re uncovering the glow hiding under all that dust and dullness. And trust me, once you see the grain start to come alive again, you’ll fall in love with oak all over.
Step 1: Set the Stage — Cleaning and Prep
Before you do anything fancy, clean it. I mean really clean it.
Wipe the whole barrel down with a damp cloth, no soaking. If it’s been outdoors or sitting in storage, you might find dirt packed into the seams. A soft brush and some mild soap water can help, but avoid harsh chemicals—they’ll strip the natural oils out of the oak.
Then—let it dry. All the way. Don’t rush it.
Oak is like a sponge; if you sand it while it’s still damp, the dust clumps and the finish turns patchy. Patience here pays off later.
Once it’s dry, step back and take a long look at it. Find the spots that tell the story—wine stains, burn marks, rough patches. You’ll want to keep those when you refinish; they’re the soul of the piece.
Step 2: Sanding — The Real Makeover Begins
Alright, this is where the fun starts. Grab some 120-grit sandpaper (or 80 if it’s really rough) and start working that surface.
And here’s the thing—don’t rush. Refinishing isn’t about power tools and speed. It’s about feel. You’ll know when you’re doing it right because the barrel will start to feel smooth, almost buttery, under your hands.
I like to sand with the grain, never against it. You’ll see the wood slowly wake up beneath the dust, like something stretching after a long nap. The scent of oak starts to come through—it’s warm, earthy, faintly sweet if it’s a real wine barrel. That’s when you know you’re getting close.
For curved parts between the hoops, hand-sanding is best. It gives you control and keeps the original shape intact.
Pro tip? Don’t erase every imperfection. Leave some of the story there. That uneven color? That’s wine and time doing their work—and you can’t fake that kind of beauty.
Step 3: Picking the Perfect Finish — Mood Matters
Once you’ve got your barrel sanded down, it’s time to decide what vibe you’re going for.
This is where your barrel gets its new personality.
If you want it natural and soft:
Go with a clear oil like tung or Danish oil. It’ll deepen the grain and make the oak glow, but still feel raw and organic. This is my favorite look—it’s that “I found this at a vineyard” feel.
If you want warmth and honey tones:
A golden oak or amber stain will give your barrel that cozy, lived-in glow—perfect for rustic homes and patios.
If you want bold and dramatic:
Try a walnut or espresso stain. It turns the barrel into a statement piece—rich, deep, and modern, especially if your hoops are dark metal.
No matter what finish you choose, always test it on the bottom first. Old oak can surprise you—it absorbs color differently depending on where it’s aged or dried.
Step 4: Applying the Finish — The Moment It Comes Alive
Here’s where everything you’ve done so far pays off.
- Wipe the surface down with a tack cloth to remove sanding dust.
- Dip a clean, lint-free rag into your chosen finish and rub it in with the grain.
- Let it sit for a few minutes—watch how the color starts to deepen right before your eyes.
- Wipe off any excess and let it dry overnight.
For oil finishes, you can repeat this 2–3 times for extra depth. For stains, one solid coat might be enough, followed by a clear sealer or varnish once it’s fully dry.
If you’re going for that polished, “showroom” feel, lightly sand between coats with 220-grit sandpaper. It keeps the surface smooth and silky.
This part always feels a little like magic to me. The wood drinks up the oil, and the whole barrel transforms—one minute it’s dull, and the next it’s glowing like it belongs in a Napa tasting room again.
Step 5: Give Those Hoops Some Love
Don’t stop with the wood! Those metal hoops are the frame for your masterpiece.
If they’re rusty, use a wire brush or fine steel wool to clean them up. Then wipe them down with a damp cloth, let them dry, and either:
- Seal them with a clear metal lacquer (for that rustic, industrial look), or
- Spray them with matte black paint for a sleek, modern contrast.
Little detail, huge difference.
Step 6: Seal and Protect — Lock in the Beauty
If your barrel’s going outside, you’ll need a tough finish to handle the elements.
Marine varnish is the gold standard—it’s waterproof, UV-resistant, and tough enough for boats, so your barrel furniture will laugh at a little rain.
If it’s staying indoors, you can use furniture wax or a light polyurethane coat. It adds just enough protection without making the surface feel too heavy or plasticky.
Once it’s sealed, step back. Take it in.
You just gave new life to something that’s probably older than you.
A Few Tips from My Workshop
- Always sand and finish in a well-ventilated space. The smell of tung oil is wonderful—but only in moderation.
- Never skip the drying time between coats. Trust me, patience now means a better finish later.
- If your barrel starts to dry out again after a few months, a quick wipe of oil will bring the luster right back.
- And my personal favorite: touch it. After it’s done, run your hands along the grain and just enjoy the feel. That’s the reward for doing it yourself.
Our Links
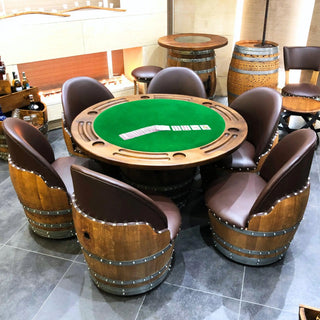
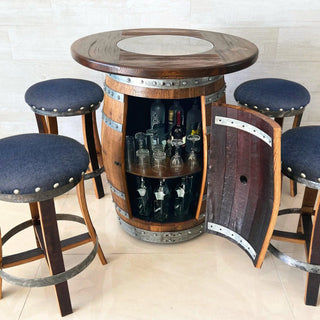
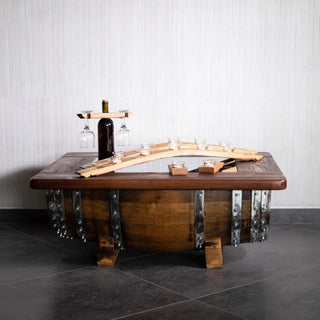
- Discover our full line of reclaimed oak barrel furniture and décor for inspiration.
- Check out our handcrafted wine barrel coffee tables and bar sets made from real wine casks.
- Learn more about oak barrel restoration, sealing, and maintenance from the experts at Oak Wood Wine Barrels.
Other Resources to Check Out!
- Fine Woodworking: The Art of Refinishing Oak Without Losing Its Soul
- The Cooper’s Journal: Traditional Wine Barrel Craft and Care
- Woodcraft Magazine: Choosing the Right Finish for Reclaimed Oak
Restoring a wine barrel isn’t just a woodworking project—it’s a conversation with time.
You’re listening to every groove, every mark, every faded patch that whispers where it’s been.
When you’re done, and the light hits that smooth oak just right, you’ll realize something: you didn’t just make it beautiful again—you honored what it already was.
So pour yourself a glass of something nice, step back, and take it in. That glow you’re seeing? That’s not just the finish. That’s pride.
Disclaimer
This article is provided for educational and informational purposes only. The refinishing techniques and recommendations shared are based on real-world experience and general woodworking practices. Always use protective gear, proper ventilation, and test all stains and sealants before full application.
Oak Wood Wine Barrels is not responsible for injury, damage, or product variations that result from DIY restoration. Finishes, materials, and methods evolve as craftsmanship advances.
For expert refinishing, restoration, or to explore our collection of fully restored oak and wine barrel furniture, visit OBARREL.COM — where every barrel gets a second chance, and every grain tells a story.