
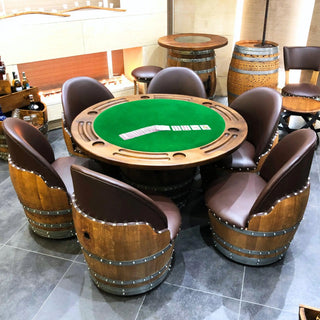
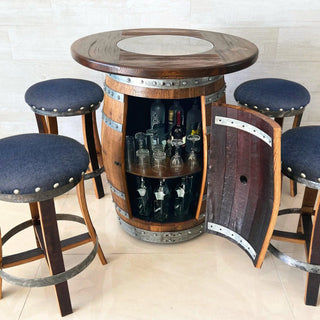
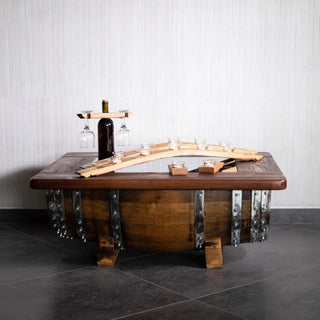
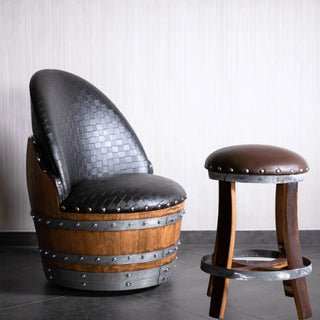
How to photograph furniture made from reclaimed oak barrels — barrel cabinets, Captain's Chairs, bistro sets, stave wall pieces — is a question with a different answer than how to photograph standard case goods or upholstery. The wood has visible grain, hand-applied finish, original char marks from the cooper, and a curved geometry that catches light unpredictably. Getting all of that on camera requires specific choices in lighting, angle, and post-processing.
This guide walks through the full process: equipment, lighting setup, styling, angles, and basic post-processing. It is written for designers, stagers, photographers, and sellers building lookbooks or listing images for their own use. We use these same techniques in our family workshop when we photograph pieces for the obarrel.com catalog and for our Etsy listings.
Time required: 30 to 60 minutes per piece (single setup, multiple shots)
Skill level: beginner to intermediate
According to the Etsy Seller Handbook and ongoing platform research, listings with clear, consistent, well-lit primary images convert at meaningfully higher rates than listings with mixed-lighting or cluttered backgrounds. The Shopify Help Center reaches the same conclusion in its merchant-facing photography guidance: clean composition, consistent white balance, and a tightly cropped detail image are the three changes that most reliably lift conversion on a product page. Editorial research published through the Journal of Retailing on online product imagery supports the same pattern across categories. The same principle applies to lookbooks intended for client presentations and to social media images intended to drive interest.
Tools and materials
| Item | Notes |
|---|---|
| Camera (DSLR, mirrorless, or recent smartphone) | Recent smartphones with manual exposure control work well |
| Tripod | Essential — barrel furniture shots benefit from longer exposures at low ISO |
| Window with indirect daylight | Best primary light source; north-facing windows work especially well |
| Optional: large softbox or LED panel | For supplemental light or for shoots after dark |
| Optional: reflector card (white foam core, ~24x36 in) | Bounces light into shadowed barrel curves |
| Microfiber cloth | Wipe down the piece before shooting; dust shows in detail shots |
| Neutral background (gray, soft white, or pale plaster) | Avoid busy walls behind the piece |
| Two or three small styling props | Glassware, ceramic vessel, single book, plant — for context shots |
Total equipment cost can be under $200 if working with a smartphone and a single foam core reflector. A more involved kit with a softbox or LED panel sits in the $400 to $800 range.
Step 1: Clean the piece thoroughly
Begin with a microfiber wipe-down of the entire piece. Dust, fingerprints, and small workshop residue all show up in detail shots taken at close range or with strong directional light. Pay special attention to the barrel-head face (a large flat surface that catches light), to the upper edges of staves, and to any engraved areas where dust collects in the cut lines.
For pieces with steel hoops, wipe the hoops with a separate dry cloth — they hold fingerprints from handling and reflect any smudges back into the camera under bright light.
Step 2: Choose your primary light source
Window daylight is the best primary light source for reclaimed oak. The capsule: position the piece roughly 4 to 8 feet from a large window (north-facing if available, or any window during indirect daylight hours), with the window light hitting the piece from a 30 to 45 degree angle rather than straight on or directly behind.
Direct sunlight is too harsh — it blows out the highlights on the spar-varnish finish and crushes detail in the shadowed curves. Indirect daylight (diffused through a sheer curtain if the window is bright) produces soft, warm-but-neutral light that flatters the oak grain.
If shooting after dark or in a windowless space, a single large softbox or LED panel placed at the same 30 to 45 degree angle works well. Use a daylight-balanced light source (5000 to 5600K). Avoid incandescent or warm tungsten bulbs as primary light — they cast a yellow tone that exaggerates the oak's warm register and makes the wood look orange in post.
Step 3: Position the reflector
Place a white reflector card opposite the primary light source, roughly 3 to 5 feet from the piece. The reflector bounces soft fill light into the shadowed side of the barrel, opening up detail in the curved staves that would otherwise fall into pure shadow.
This single step does more for barrel photography than any other lighting choice. The curve of the barrel creates a natural shadow gradient. Without a reflector, the gradient becomes too steep and the shadowed side of the piece reads as a dark mass rather than as visible wood. The reflector restores the wood texture on the shadow side without overpowering the natural directional light.
Step 4: Compose the primary listing shot
The primary listing shot should show the entire piece, centered, at a slight angle that reveals both the front face and one side. The capsule: shoot from eye-level with the piece (not from above or from below), framed loosely with neutral background visible above and around the piece, with the camera positioned roughly 6 to 10 feet from the subject.
Avoid these common composition mistakes:
- Shooting from above. Tilting down toward the piece foreshortens the proportions and makes the piece look squat.
- Shooting from below. Tilting up makes the piece look top-heavy and exaggerates the steel hoops.
- Cropping too tight. Listings need breathing room around the piece. Crop loosely; viewers want to see the full silhouette.
- Cluttered background. A textured wallpaper, gallery wall, or other furniture behind the piece pulls attention away. Use a clean plaster, painted, or fabric backdrop.
The shot should be sharp throughout. Use a tripod, set the aperture to f/8 to f/11 for full depth of field, and use ISO 200 or lower for clean detail in the wood grain.
Step 5: Capture the detail shots
After the primary composition shot, take three to five detail shots that show specifically what makes the piece authentic:
- The char and grain inside a cabinet door (open the door, shoot the interior face)
- The original steel hoop joint where the riveted band wraps the staves
- The engraving area if the piece carries custom engraving
- The end-grain of a barrel head showing the assembled head construction
- The spar varnish finish surface at a slight angle that catches light, showing the satin sheen
Detail shots tell buyers the piece is real. They differentiate a handcrafted barrel piece from mass-produced furniture pretending to look reclaimed. For lookbooks and client presentations, these detail shots often carry more persuasive weight than the wide composition shot.
Step 6: Stage a context shot
After the clean listing and detail shots, set up one or two context shots showing the piece in use within a styled vignette. The capsule: a context shot includes the piece plus 2 to 4 styling props that suggest how the piece functions in a real room — without overcrowding the frame.
Props that suit oak barrel pieces:
- Two simple wine glasses or a small decanter
- A single ceramic vessel in a warm-neutral tone
- A small stack of books, spines turned toward the camera
- A single plant in a simple ceramic or terra cotta pot
- A folded textile (linen napkin, small throw) in a neutral color
Props that fight oak barrel pieces:
- Brightly colored accessories (saturated red, electric blue, neon)
- Heavily patterned textiles
- Plastic objects, branded packaging, anything visually cheap
- Too many props — more than 4 starts to crowd the composition
Style the context shot, take it, then remove the props and take a clean version of the same composition. Both versions have a use — the styled version for social and lookbooks, the clean version for catalog listings where buyers want to see the piece itself.
Step 7: Post-process for grain detail
Post-processing barrel furniture photos has one main goal: preserve the visible oak grain and the natural warmth of the wood without pushing the color cast too far in either direction. The capsule: adjust white balance to slightly cooler than the original (the camera will usually capture the wood as warmer than it actually appears in person), increase clarity or texture slightly to bring out grain, and avoid over-saturating the warm tones.
A basic post-processing pass:
- White balance. Cool slightly. If the camera captured the wood at 4800K, push toward 4400K. Use the white wall in the background as a reference — it should look neutral white, not yellow.
- Exposure. Brighten by a quarter to half stop if needed. Barrel furniture often photographs slightly darker than the eye sees it because of the dense wood mass.
- Shadows. Lift shadows moderately (+15 to +25 in most editors). This opens up the curved shadow side of the barrel without flattening the directional light.
- Highlights. Reduce slightly (-10 to -20) if the spar varnish is creating bright reflective spots on the barrel head.
- Clarity / texture. Increase slightly (+10 to +20). This brings out the wire-brushed grain and the char marks. Do not push beyond +30 — over-textured oak looks artificial.
- Saturation. Leave alone or reduce by 5. Oak wants to stay in its natural warm-neutral register. Over-saturated warm tones make the wood look orange.
Common mistakes
Yellow cast from incandescent lighting. The most frequent issue we see in seller-submitted photos. Standard household incandescent bulbs cast a strong yellow tone that the camera reads as the wood's natural color. Fix at the shoot stage by using daylight or daylight-balanced LED, or fix in post by aggressively cooling white balance.
Glare on the spar varnish. Direct light on the satin finish creates bright reflective spots that read as blown highlights. Move the light source to a higher angle, diffuse it through a sheer curtain, or reposition the piece slightly. A reflector on the bright side is not the answer here — it amplifies the issue.
Backlit silhouette. Shooting with the window directly behind the piece turns the wood into a silhouette. Move the piece so the window is to one side at 30 to 45 degrees.
Overcompressed final images. Both Etsy listings and Shopify catalog pages render images at specific maximum dimensions. Save final images at the platform's recommended size (typically 2000 to 3000 pixels on the long edge for listings, 1500 to 2000 for social) and at 80 to 90 percent JPEG quality. Lower compression preserves wood grain detail.
Where to see well-photographed barrel pieces
For reference, the our favorites collection at obarrel.com shows our current standout pieces photographed using exactly the techniques in this guide — window-light primary, reflector fill, neutral background, restrained styling. Designers and stagers building lookbooks are welcome to use those images as reference inspiration for their own setups.
For trade clients and designers who need higher-resolution product photography for client presentations or for editorial use, the contact page at obarrel.com is the right route. We provide print-resolution images of any piece on request, at no charge, for legitimate trade and editorial use.