Preserving the Charm: How to Weatherproof Reclaimed Wine Barrels for Years of Use
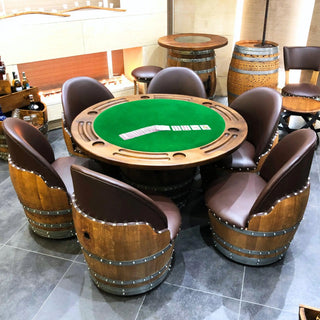
There’s something about a reclaimed wine barrel that just stops you in your tracks. The way it smells faintly of oak and red wine. The way the wood curves perfectly around its iron hoops. It’s rustic, it’s romantic—and it feels like it belongs both in a vineyard and on your patio.
But as beautiful as these barrels are, Mother Nature doesn’t care how charming they look. Sun, rain, humidity, and even morning dew—all of it slowly eats away at your barrel’s finish. The wood starts to gray, the hoops rust, and that gorgeous glow fades into something that looks… tired.
If you’ve ever watched a once-beautiful barrel slowly weather and thought, “Man, I wish I could’ve kept it like new,” this one’s for you.
The good news? You can preserve that warm, golden tone and keep your barrel looking rich and alive for years—without killing its natural character. Let’s walk through exactly how to do it the right way.
Why Weatherproofing Is About More Than Just Looks
Here’s something I learned early on in the workshop—oak barrels are alive, even after they’ve been retired. The wood still breathes. It expands, contracts, and reacts to whatever environment it’s in. That’s why barrels that thrive in a cool wine cellar can start cracking and shrinking when they’re exposed to the elements.
Weatherproofing isn’t about making your barrel shiny—it’s about keeping it healthy.
Think of it like skincare for wood. The right protection locks in its natural oils, shields it from UV damage, and keeps it from drying out. Do it right, and your reclaimed oak barrel furniture will last for decades, not just seasons.
Step 1: Prep the Barrel — Start Fresh, Stay Strong
Before we even think about oils or finishes, we’ve got to start clean.
Wash away the years.
Grab a soft brush or cloth and give your barrel a good wipe-down. A little warm water and mild soap is fine—but don’t drench it. Oak hates standing water as much as your phone does.
If it’s been sitting outside for a while, you might see a little mildew or graying on the surface. Don’t panic. That’s just nature leaving fingerprints.
Dry it out completely.
This step’s critical. Moisture trapped under a finish will cause bubbling and peeling later. Let it dry in the shade for at least 24 hours before you do anything else.
Inspect and tighten.
Check for loose hoops and small cracks. If a metal band has slipped, gently tap it back up with a rubber mallet and a towel to protect the finish. Fill any hairline cracks with sawdust and wood glue, then sand them smooth.
When you run your hand across the surface, it should feel even and dry. That’s your starting line.
Step 2: Sanding — Reveal the Oak’s Hidden Glow
This is where the magic begins. There’s nothing quite like watching years of wear fade away under a sander, revealing that buttery oak grain beneath.
Use 120-grit sandpaper for your first pass to remove oxidation and weather stains. Then finish with 220-grit to get that soft, velvety feel. Move with the grain, not against it. Oak has a rhythm to it—you’ll feel it as you go.
Don’t aim for perfection; aim for revival. Leave a little texture, a little story. That’s what makes reclaimed oak furniture so addictive—it’s imperfect in all the right ways.
Step 3: Choose Your Finish — The Real Armor
This is where most DIY-ers trip up. You can’t just slap on furniture polish and hope for the best. You’ve got to pick the right finish for your lifestyle and climate.
Let’s talk about your options:
Natural Oils (The Soft Touch)
If you love that earthy, organic look—go for tung oil or Danish oil. They penetrate deep into the wood, feeding it from the inside out. The finish is subtle, matte, and feels alive under your fingertips.
It won’t peel or crack, but it does need a refresh every few months. Think of it as “spa day for oak.”
Marine Varnish (The Heavy-Duty Shield)
If your barrel’s sitting outside in direct sun, rain, or snow—this is the way to go. Marine varnish is built for boats, so a little patio weather doesn’t scare it. It forms a hard, glossy layer that laughs in the face of UV rays and water.
Three thin coats will do the trick. Just remember to lightly sand between each one to keep things smooth.
The Hybrid Approach (My Secret Weapon)
This one’s my personal favorite: apply tung oil first, then finish with a thin layer of marine varnish. The oil soaks in to nourish the oak, while the varnish locks it all in with a protective barrier.
It gives you the rich, hand-rubbed warmth of an oil finish and the weather resistance of varnish. Perfection.
Step 4: Mind the Metal — Hoops Need Love Too
The oak gets most of the attention, but those metal bands are the unsung heroes holding your barrel together.
If they’re rusty, don’t stress—just grab some fine steel wool or a wire brush and clean them up gently. Wipe them down with a cloth afterward, and once dry, rub on a thin layer of clear metal lacquer or even a dab of mineral oil.
It keeps the hoops from rusting, adds a subtle sheen, and makes the whole piece look polished and intentional.
If you want to go modern, matte-black spray paint looks incredible against warm oak tones. It’s a small touch that makes a huge statement.
Step 5: Maintain the Magic — Weatherproofing Is a Routine, Not a Chore
Here’s the truth no one tells you: there’s no “set it and forget it” with real wood.
But that’s not a bad thing. The maintenance is part of the beauty—it’s a ritual.
Once or twice a year, wipe your barrel clean, check the finish, and reapply oil or varnish where it looks dull. Keep it slightly elevated so rainwater can’t pool underneath.
And if you ever see the color start to fade or dull—don’t wait. A quick touch-up will keep that glow alive for years.
A well-cared-for barrel doesn’t just survive the seasons—it ages with grace.
Our Links
- Explore our expert oak barrel restoration and outdoor protection guides.
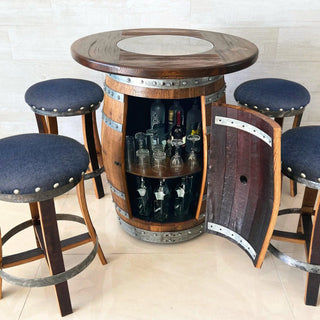
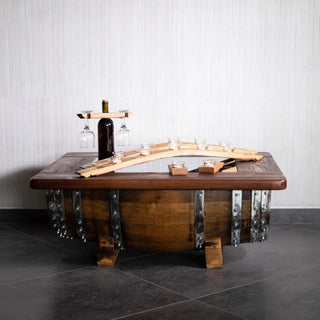
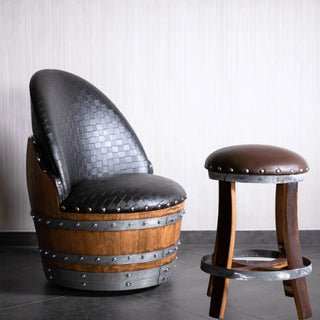
- Check out our handcrafted outdoor barrel furniture and décor collections.
- Learn more about how Oak Wood Wine Barrels preserves reclaimed wine casks that last generations.
Other Resources to Check Out!
- This Old House: Protecting Outdoor Wood Furniture Naturally
- Bob Vila: The Best Oils & Sealers for Outdoor Wood Projects
- Woodworker’s Journal: Understanding How Wood Reacts to Weather
There’s something incredibly grounding about working with reclaimed oak. Every time you restore a barrel, you’re continuing its story—one that began in a vineyard, rolled through decades of use, and now sits proudly in your home or garden.
When you take the time to weatherproof it, you’re not just protecting furniture—you’re honoring craftsmanship.
So the next time you see raindrops sliding off your freshly sealed barrel or sunlight catching that rich golden hue, you’ll smile knowing this: you didn’t just save a piece of wood. You gave it another life.
And that kind of care? That’s the real definition of charm.
Disclaimer
This article is provided for informational and educational purposes only. The weatherproofing methods described here are based on personal woodworking experience and general restoration techniques. Always work in a well-ventilated area, wear protective gear, and test any finish on a small section first.
Oak Wood Wine Barrels is not liable for injury, property damage, or unexpected results from DIY refinishing. Product types and finishes may evolve as our craftsmanship advances.
For professional-grade finishing or to browse our line of outdoor-ready oak barrel furniture, visit OBARREL.COM — where every reclaimed barrel gets a new chapter, one coat at a time.