
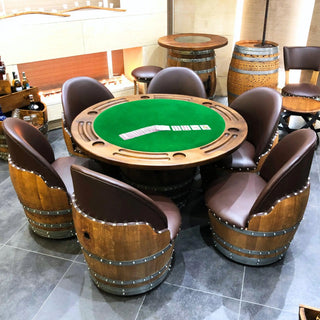
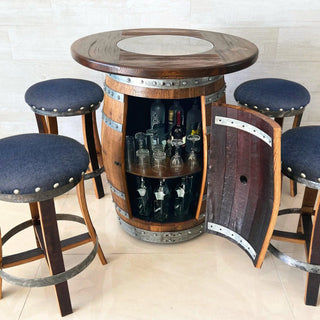
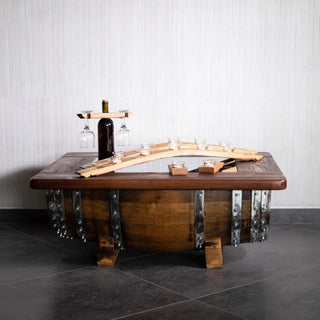
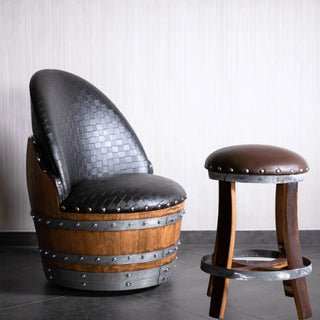
Short answer: Ten 5-Bottle Stave Wall Racks ($247.50 each, $2,475 for ten) accommodate 50 bottles over approximately 7 to 10 feet of wall. Want to keep some of the collection behind a door? Pair the Top Shelf Bar Cabinet ($1,259.10) with six racks that display 30 bottles. Both are sold by Oak Wood Wine Barrels and made from retired oak Wine Barrels; the five setups below show how to combine them.
Prices as of October 6, 2026; each link shows live stock.
How much space does a 50-bottle bourbon collection need?
Less floor than you'd think, if the bottles are on the wall. Each 5-Bottle Stave Wall Rack is 8.5 inches wide, stands 37.2 inches tall and can hold any five bottles. Ten racks side by side will take up about 7 feet of wall with no gaps, or about 10 feet with 4 inches between racks.
Bourbon bottles come in all shapes and sizes, so before you design a shelf or a cabinet, measure your tallest and widest bottles. A collection also grows, so allow room for 10 to 20 more bottles than you have today.
What are the best barrel furniture setups for 50 bottles?
1. The bottle wall: ten racks, 50 bottles on display
- Pieces: ten 5-Bottle Stave Wall Racks.
- On display: 50 bottles.
- Price: $2,475.
- Room: 7 to 10 feet of wall, no floor space.
This is the easiest way to see all the bottles at a glance. Each rack has back hooks installed; you add the wall hooks. Group the racks by distillery so the wall reads more like a library and less like a store shelf.
2. The bar and the wall
- Pieces: Home Bar Set #1 (from $2,565), which features a barrel bar, round top, two stools and two 5-bottle holders, plus eight more 5-Bottle Stave Wall Racks.
- On display: 50 bottles on the wall.
- Price: $4,545.
- Room: the wall, plus around 6 feet out for the bar and bar stools.
Pour at the bar and keep the collection behind it. The bar is intended for holding wine, hanging glasses and storing spirits, so the open bottles are kept in it.
3. The cabinet and the display
- Pieces: the Top Shelf Bar Cabinet with six 5-Bottle Stave Wall Racks.
- On display: 30 bottles, the rest in the cabinet.
- Price: $2,744.10.
- Room: a 27-inch-square cabinet space and 4 to 6 feet of wall.
The cabinet includes multi-layer bottle storage, hidden storage inside and wheels. Use it for the sealed bottles you are saving, and keep the bottles you are drinking on the wall. Call (832) 933-8787 to check your tallest bottle before ordering; your bottle shapes will determine how many fit inside.
4. The two-cabinet tasting room
- Pieces: the Double Liquor Cabinet (from $4,248): two barrel bar cabinets with two round tops and four stools, plus four 5-Bottle Stave Wall Racks.
- On display: 20 bottles, the rest in two cabinets.
- Price: $5,238.
- Room: a dedicated room or a long wall.
The two cabinets allow you to separate the collection: sealed bottles in one, open bottles and glassware in the other. The round tops are where guests sit for a tasting.
5. The rotation shelf
- Pieces: a Bar Cabinet ($1,237.50) and three 3-Bottle Stave Wall Racks ($175.50 each).
- On display: 9 bottles, this month's pours.
- Price: $1,764.
- Room: one wall, 37 inches of rack width.
For collectors who keep most of their bottles out of sight and only display what's open. Change the nine on display monthly.
Which setup fits your room?
| Setup | Pieces | Bottles on display | Price |
|---|---|---|---|
| 1. Bottle wall | 10 × 5-bottle racks | 50 | $2,475 |
| 2. Bar and wall | Home Bar Set #1 + 8 racks | 50 | $4,545 |
| 3. Cabinet and display | Top Shelf Bar Cabinet + 6 racks | 30 | $2,744.10 |
| 4. Two-cabinet tasting room | Double Liquor Cabinet + 4 racks | 20 | $5,238 |
| 5. Rotation shelf | Bar Cabinet + 3 × 3-bottle racks | 9 | $1,764 |
All bottle racks are in Wall & Wine Racks, and the bars and cabinets are in Barrel Bars.
Should bourbon bottles be stored upright or on their side?
Upright, for bottles you wish to keep. High-proof spirits can eat away at a cork that's in contact with them for years. Wine is the opposite: it is stored on its side to keep the cork moist, and that is how our free-standing 9-bottle rack holds it. Store sealed bourbon standing in a cabinet, and display the bottles you are drinking.
Wherever they live, keep bottles out of direct sunlight and away from heat. Room temperature, steady and ordinary, is fine.
How do you plan for the collection to grow?
Build in repeatable blocks. Racks can be added one at a time ($247.50 each). Later, a second cabinet can join the first one. Don't fill every inch now; leave a gap at the end of the wall for the next two racks.
Check out The 12 Most Iconic Bourbons Every Collector Should Try at Home for how to display your favorite dozen. See Turn a Formal Room You Never Use into a Bourbon Library Lounge for turning a spare room into a full library.
Frequently asked questions
How many bottles does a 5-Bottle Stave Wall Rack hold?
Any five bottles you pick. It is 8.5 inches wide and 37.2 inches tall and made from Wine Barrel staves and metal hoops.
What is the cheapest way to display 50 bottles?
Ten 5-Bottle Stave Wall Racks ($2,475). Three 3-bottle racks ($526.50) show nine if you only need to show part of the collection.
Are the bottles included?
No. The racks and cabinets are for bottles you already own.
Can I mix 3-bottle and 5-bottle racks on one wall?
Yes. The 3-bottle rack is 37.2 inches long and hangs horizontally; the 5-bottle rack is 37.2 inches tall and hangs vertically. Together, they give the wall both rows and columns.
How fast will it ship?
Oak Wood Wine Barrels ships in-stock orders within five business days. Free shipping is included within the continental U.S. Larger orders, such as bar sets, are delivered by appointment.