
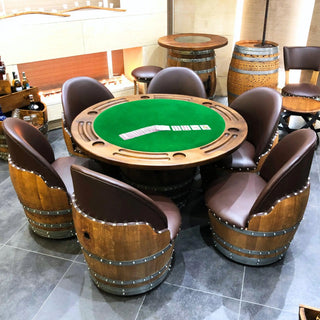
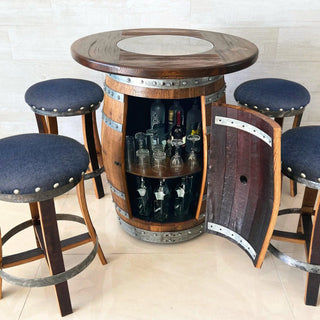
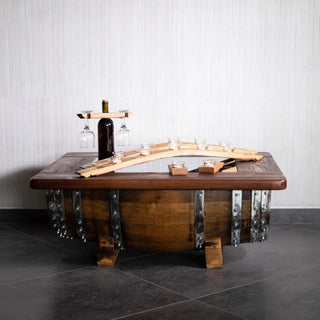
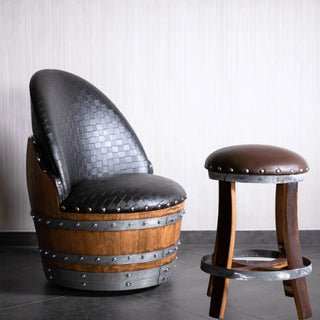
A garage to home bar conversion is one of the most common ways homeowners gain serious entertaining space without an addition — but it is also the conversion most likely to destroy the wine and bourbon barrel furniture put in it. The single critical word in this entire walkthrough is insulated. An uninsulated garage with raw concrete floor and exposed studs is not a candidate for a barrel-anchored bourbon lounge; the temperature and humidity swings will crack staves, loosen hoops, and ruin the spar varnish finish within a few seasons. A properly insulated, conditioned, finished half-garage conversion, on the other hand, makes an excellent bourbon lounge. The walkthrough below is the difference between those two outcomes. Our family workshop has shipped 1,527-plus barrel pieces, and the warranty calls we get from garage installations are almost always traceable to one of the four "kill conditions" listed in the next section — which is why this whole post starts with the shell, not the furniture. This conversion sits inside our broader 11 basement bar layouts cornerstone for picking a room shape, and pairs with our 3-zone basement bar layout walkthrough for the interior arrangement. For the barrel pieces themselves once the room is ready, our full barrel set collection is here.
Time required: 4-8 weekends DIY for the build-out, plus 2-3 weeks for electrical and HVAC contractors. Skill level: Intermediate to advanced; involves framing, insulation, drywall, and electrical work that may require permits.
Tools and materials
| Tool or material | Purpose |
|---|---|
| Tape measure, chalk line, level | Layout |
| Framing nails / screws + framing nailer | Partition wall |
| Insulation (R-13 to R-21 walls, R-30+ ceiling) | Climate control |
| Vapor barrier | Moisture management |
| Drywall + mud + tape | Finished walls |
| Subfloor (DRIcore or 3/4" plywood + foam) | Insulated, moisture-resistant floor base |
| Engineered hardwood, LVP, or porcelain tile | Finish floor |
| Mini-split HVAC or extended HVAC | Temperature and humidity control |
| Hygrometer | Monitor humidity |
| Smoke alarm + CO detector | Code-required safety |
| Permitted electrical panel work | New circuits |
Why uninsulated garages destroy barrel furniture
Before any walls go up, understand the problem you are solving for. Authentic wine barrel furniture is built from oak that has been seasoned for years and finished with marine-grade spar varnish, but it is still solid wood. Solid wood reacts to environmental swings:
- Temperature swings over 30 degrees Fahrenheit in 24 hours stress the joinery
- Humidity below 30 percent dries the staves and causes shrinkage, loosening hoops
- Humidity above 60 percent swells the staves and stresses the joinery the opposite direction
- Direct sun on finished oak breaks down the varnish over years
A typical uninsulated U.S. garage experiences all four problems annually. Summer days hit 110-120 degrees inside; winter nights drop below freezing in most of the country; humidity swings 20-80 percent between seasons. This is why the warranty on most authentic wine barrel furniture explicitly excludes uninsulated garage use, screened porch use, and unheated cabin use.
The conversion process below brings the half-garage to indoor-furniture conditions: a stable 65-75 degrees Fahrenheit and 35-55 percent humidity year-round. Inside those bounds, oak barrel furniture lasts decades.
[Source: USDA Forest Service Forest Products Laboratory, "Wood Handbook: Wood as an Engineering Material" (FPL-GTR-190), Chapter 4 on equilibrium moisture content (EMC), dimensional stability, and acceptable indoor RH ranges for finished hardwood.]
Step 1. Decide the partition and check codes
A "half-garage" conversion typically leaves the front half (closest to the door) as vehicle parking and converts the back half into living space. The partition wall separates the two and must usually be code-rated as a fire separation (typically 1-hour fire-rated assembly with 5/8" Type X drywall on the garage side).
Check local building codes before any construction:
- Permits are typically required for partition walls, electrical, and HVAC additions to a garage
- Fire separation requirements between garage and living space (varies by jurisdiction)
- Egress requirements (a converted living space typically needs a door or egress window)
- Ceiling height requirements (most codes require 7'0" minimum for habitable space; some allow 6'8")
A 30-minute conversation with the local permit office before any work starts is cheaper than tearing out non-conforming work later.
Step 2. Frame and insulate the partition
The partition wall is standard 2x4 framing on 16-inch centers, typically running the full ceiling height. On the garage side, finish with 5/8" Type X drywall (fire-rated). On the lounge side, standard 1/2" drywall works.
Insulate the partition cavity with R-13 or higher batt insulation. This is for both fire performance and sound — without partition insulation, you will hear the garage door opening from inside the lounge.
If the garage door bay remains operational on the garage side, leave a 12-inch service gap or framed door between the two sections so cars can still come and go without affecting the lounge.
Step 3. Insulate the existing exterior walls
This is the most important step for barrel furniture protection. The exterior garage walls are typically uninsulated studs facing the back of the garage's exterior siding. Insulate every cavity with R-13 to R-21 batt insulation (R-21 for cold climates).
Add a continuous vapor barrier on the interior face of the insulation before drywall — 6-mil polyethylene sheeting is standard. The vapor barrier prevents warm interior moisture from migrating into the cold wall cavity and condensing on the cold-side sheathing.
Skipping insulation here is the most common amateur mistake. The lounge will feel okay for the first few weeks, then become unusable when the first real heat wave or cold snap hits.
Step 4. Insulate the ceiling
If the garage ceiling is open to the attic, blow R-30 to R-49 cellulose or fiberglass into the attic above the converted zone (matching the rest of the house's ceiling insulation).
If the garage ceiling is the underside of a roof deck (no attic above), use R-30 batt or rigid foam between rafters with proper venting baffles to maintain the roof's existing ventilation.
For finished basements, ceiling insulation is less critical because basement temperatures are naturally stable. For garage conversions, it is critical — uninsulated ceilings let summer attic heat (130+ degrees) bake into the lounge.
Step 5. Insulate the floor
Concrete garage floors are cold sinks. In winter, a 35-degree garage slab will cool the lounge from the floor up regardless of HVAC. The solution is an insulated subfloor system.
Option A: Interlocking subfloor panels (DRIcore or similar) — 7/16" OSB bonded to a polyethylene moisture barrier underneath. Installs in a day. Adds 7/8" of height.
Option B: 2x4 sleepers laid flat on the slab with rigid foam insulation between, topped with 3/4" plywood. Adds 2-1/4" of height. Higher insulating value than Option A.
Floor finish on top: Engineered hardwood, luxury vinyl plank (LVP), or porcelain tile all work. Avoid solid hardwood directly on concrete subfloor — it cups and warps even with vapor barrier.
The floor decision affects everything else. Plan it before partition walls go up so the wall framing sits on the finished subfloor.
Step 6. Climate control — mini-split or extended HVAC
A converted garage needs dedicated climate control. Two viable approaches:
[Source: International Residential Code (IRC), Section R302 on fire-resistance-rated separation between a private garage and dwelling unit (typically 1/2" gypsum on the dwelling side and 5/8" Type X on the garage-ceiling side under habitable rooms).]
[Source: ENERGY STAR "Recommended Home Insulation R-Values" by climate zone, used for wall (R-13 to R-21) and ceiling (R-30 to R-49) selection in converted garage envelopes.]
Mini-split heat pump (typical $3,500-$6,000 installed): A wall-mounted indoor head + outdoor compressor unit. Handles both heating and cooling, no ductwork needed. Best for converted spaces because installation is non-invasive to the rest of the house.
Extended central HVAC ($2,500-$5,000 installed): Run ductwork from the existing furnace and add supply + return registers in the converted space. Best if existing system has spare capacity (most do not — confirm with HVAC contractor before assuming).
Whichever path: size for the climate, not the square footage alone. A 200-square-foot converted garage in Minnesota needs more heating capacity than a 200-square-foot converted garage in Georgia.
Humidity control: Add a hygrometer ($15) and aim for 35-55 percent humidity year-round. Most heat pump systems handle summer humidity through cooling; winter dryness in cold climates may require a small standalone humidifier ($50-$200).
[Source: Air Conditioning Contractors of America (ACCA), Manual J 8th Edition "Residential Load Calculation" — the industry-standard methodology for sizing heating and cooling equipment in residential and converted spaces.]
Step 7. Electrical — plan circuits before drywall
A converted bourbon lounge needs more electrical capacity than a garage. Plan circuits before drywall closes the walls.
Minimum recommended circuits:
- 1 dedicated 20-amp circuit for lighting (LED dimmer-compatible)
- 1 dedicated 20-amp circuit for bar zone outlets (refrigeration, lighting, blender, sound)
- 1 dedicated 20-amp circuit for entertainment zone (TV, AVR, projector)
- 1 dedicated 15-amp circuit for general outlets
- 1 dedicated circuit for mini-split HVAC (sized per equipment, typically 15-30 amp)
Total 4-5 new circuits typically require a panel upgrade or sub-panel if the existing panel is at capacity. Get an electrician's load calculation before committing.
Outlet placement: Plan outlet locations before walls close. You want outlets every 8-12 feet on long walls, with cluster outlets behind the bar zone and entertainment zone.
Step 8. Ventilation — especially if cigars are part of the plan
If the bourbon lounge will host cigars, dedicated ventilation is mandatory. Cigar smoke contains particulates that destroy oak finish over time and produce a permanent smell that no amount of cleaning removes.
Best solution: A dedicated cigar-rated air filter (HEPA + activated carbon) sized for the room volume, running continuously during use. Cost $300-$800.
Add to that: An inline exhaust fan ducted to outside, controlled by a switch at the bar. Run the fan during cigar use to actively vent smoke rather than just filtering it.
Mistake to avoid: Smoking in a closed converted space without ventilation. Within 6 months the oak furniture will smell like cigar permanently, and the spar varnish will yellow.
If cigars are not part of the plan, standard residential ventilation (matching the rest of the house) is sufficient.
Step 9. Finish surfaces and bring in the bar
Once the shell is complete (framed, insulated, drywalled, primed, painted), the lounge is ready for furniture. This is the safe point to bring in authentic wine barrel furniture — a converted, insulated, HVAC-conditioned space is functionally identical to a finished basement from the furniture's perspective.
Bring the furniture in during a season with moderate humidity (spring or fall), let it acclimate to the room for 48 hours before final placement, and verify humidity stays in the 35-55 percent range across at least one full seasonal cycle before declaring success.
Our full barrel set collection — bar, stools, lounge chair, side table — anchors a converted half-garage lounge well because the matched finish creates visual cohesion in a smaller space.
Step 10. Plan the bar layout for a converted space
Half-garage conversions typically yield a 200-350 square foot lounge. At that size, the 3-zone layout collapses to 2 zones — bar + lounge — with entertainment handled by a wall-mounted TV in the lounge.
Typical layout: Bar against the partition wall (the one separating from the still-active garage), with stools facing the partition. Lounge seating along the exterior wall, facing the TV mounted on the partition above the bar. This keeps the deepest furniture (lounge sectional) on the longest wall and the bar accessible from both the door and the lounge.
Lighting layers (covered in detail in our acoustic treatment guide and lighting series): pendants over the bar, ambient sconces or table lamps in the lounge, no harsh overhead.
Common mistakes in garage-to-lounge conversions
Mistake 1: Skipping insulation to save budget. This is the difference between a lounge that lasts 30 years and one that destroys $5,000 worth of furniture within 3.
Mistake 2: Underestimating HVAC sizing. A converted garage often has greater heat/cool load per square foot than the rest of the house because of the slab and the exterior wall ratio.
Mistake 3: Cigar use without ventilation. Permanent smell + accelerated finish degradation.
Mistake 4: Skipping vapor barrier on insulated walls. Moisture migrates into cold cavities and grows mold within 2-3 winters.
Mistake 5: Permit avoidance. Unpermitted electrical and partition work can affect insurance and resale; some jurisdictions require demolition.
Mistake 6: Bringing in barrel furniture before HVAC is running and verified. Even a few weeks of unconditioned exposure can crack staves.
Mistake 7: Treating "insulated garage" as a marketing phrase. Some builders use the term loosely. The functional definition: continuous insulation in walls and ceiling, vapor barrier, HVAC sized to maintain 65-75 degrees and 35-55 percent humidity year-round.
Quick recap
Confirm permits. Insulate everything — partition, exterior walls, ceiling, floor. Add dedicated HVAC sized for the space. Plan electrical and ventilation before drywall closes the walls. Acclimate furniture during a moderate-humidity season after the shell is complete. Get a hygrometer and verify a full seasonal cycle before declaring success.
Done right, a half-garage bourbon lounge functions identically to a finished basement and lasts decades. Done wrong, it destroys both the furniture and the investment. The difference is insulation and climate control.
For barrel-anchored sets ready for a properly converted space, browse our full barrel set collection.