How to Build a Whiskey Barrel Bar Step-by-Step
Why a Whiskey Barrel Bar?
Here’s the thing: almost everyone has a shelf or a little cart where they keep bottles. But when you walk into a room and see a full oak whiskey barrel turned into a bar? That’s different. That’s memorable. That’s the kind of thing guests walk up to, touch, and ask about before they even sit down.
And whiskey barrels aren’t just props. They’re tough, they’re seasoned, and they’ve already lived a life in a distillery. The charred oak inside has soaked up whiskey for years, maybe decades, shaping its flavor. You’re not just building a bar — you’re reimagining history, giving the barrel a second life as the centerpiece of your home.
Plus, let’s be honest: it just looks cool. Rustic charm meets functional furniture. And the best part? You can build one yourself with some patience, basic tools, and maybe a little stubbornness when the oak refuses to cooperate.
What You’ll Need (and Why)
I’m not going to overwhelm you with a lumberyard-sized list. Here’s the practical gear:
- One oak whiskey barrel. The real deal — solid staves, tight hoops. If it smells faintly like whiskey when you open it, even better.
- A saw. A reciprocating saw is easiest for curved cuts. Jigsaw works too. Circular saw if you’re brave.
- A drill and screws/bolts/rivets. Non-negotiable. These keep the staves from springing apart once you cut.
- Sandpaper or a power sander. 80-grit for knocking down roughness, 220-grit for a nice finish.
- Wood filler. Optional, for sealing little cracks or gaps.
- Hinges and a latch. For the cabinet-style door.
- Shelving boards. Oak planks if you want to stay true, plywood if you’re being practical.
- Finish. Polyurethane (shiny and spill-proof), varnish (classic), or tung oil (rustic and natural).
- Optional fun stuff. LED lights, casters, foot rails, stemware racks. This is where your personality shows up.
And don’t forget safety gear. Goggles, gloves, dust mask. Cutting into oak hoops without them is asking for sparks in the eye or oak dust in your lungs.
Step 1: Reinforce Before You Cut
Barrels are sneaky. They look solid, but they’re really just wooden staves squeezed together by tension from the hoops. Cut into it raw, and it’s like pulling the pin on a grenade — boom, pile of planks.
So before you even think about sawing, lock it down. Drill screws, bolts, or rivets through the hoops into the staves. Go all the way around, on every hoop. Think of it as giving your barrel a spine before you open it up.
I skipped this once, thinking, “Eh, it’ll be fine.” It was not fine. The whole thing popped apart like a wooden slinky. Learn from my mistake.
Step 2: Pick Your Style
This is where you ask: what kind of bar do I want?
- Cabinet-style barrel bar. Classic. Cut a door in the front, add shelves inside, and use the top as a serving surface.
- Split-barrel console. Cut it vertically, mount the halves against a wall, and add shelves. Slim, sleek, space-saving.
- Whole barrel with bar top. Keep it intact, slap a big round top on, and you’ve got a pub-style stand-up table.
For this guide, I’m walking you through the cabinet style. It’s versatile, practical, and looks amazing.
Step 3: Cut the Door
Mark out your door with chalk or painter’s tape. Oval? Rectangle? Arch? Totally up to you. Personally, I like a tall oval cut — looks classy, easy to open.
Grab your saw and start slow. Oak is dense, and when you hit the hoops, expect sparks. Don’t panic — that’s normal. Take your time. This isn’t a race.
When the panel comes free, set it aside. That’s your door. Don’t toss it. Future you will need it.
Sand the cut edges so you don’t snag a sweater or skin later.
Step 4: Shelving Inside
Now for the fun-but-tricky part: shelves. Barrels are curved. Straight shelves don’t naturally fit. You’ve got two routes:
- Custom fit. Cut planks to follow the curve. Gorgeous but requires patience and measuring.
- Bracket method. Use L-brackets and mount straight planks inside. Faster, easier, and honestly — unless someone’s crawling in with a flashlight, nobody’s judging.
Space your shelves based on what you’ll store. Bottles? Taller spacing. Glasses? Mid-sized shelves. Want to really impress? Add a stemware rack under the top shelf so wine glasses hang neatly.
Step 5: Reattach the Door
Remember that panel you cut out? Time to bring it back.
Sand it smooth, attach hinges on one side, add a magnetic latch or knob, and suddenly you’ve got a secret compartment. Open it up, and bam — your whiskey stash is inside. Guests will love it.
Step 6: Sand the Exterior
This is the glow-up stage.
Start with 80-grit, move to 120, finish with 220. Don’t sand it into looking “new” — you want the character. Leave the stains, the scratches, the weathered charm. That’s what makes it rustic.
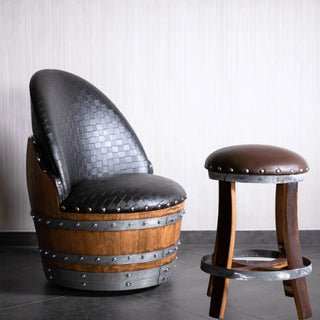
Polish the hoops if you want shine, or leave them rough and aged. One time, I painted mine matte black. Looked industrial and sleek, like something out of a speakeasy.
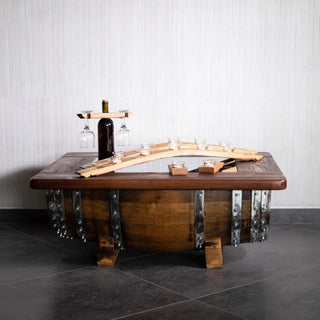
Step 7: Add a Bar Top (Optional)
You don’t have to, but an oversized top makes your barrel way more functional.
- Glass. Sleek, modern, lets you see the barrel.
- Wood slab. Heavy, rustic, solid.
- Barrel head. Authentic and simple.
Bigger tops give space for stools, turning your bar into a true hangout spot.
Step 8: Seal & Finish
This is where the oak grain comes alive.
Brush or wipe on your finish of choice. I like tung oil — it soaks in and feels warm to the touch. Polyurethane, though, is bombproof for spills. Whatever you choose, go for at least three coats, sanding lightly between.
As you apply the finish, you’ll see the oak grain glow. It’s the moment you step back, wipe your brow, and think, “Yeah… this was worth every minute.”
Step 9: Finishing Touches
Now for the personality:
- Add a foot rail for that pub vibe.
- Drop in LED lights for a soft glow inside.
- Mount casters on the bottom — trust me, once it’s stocked, you’ll wish it rolled.
- Brand or stencil the top with your initials, family crest, or favorite whiskey logo.
I once saw someone line the inside with copper sheet. When the lights hit it, the whole thing shimmered like a distillery showcase. Absolute showstopper.
Living with a Barrel Bar
Here’s the truth: once you’ve got a whiskey barrel bar, you’ll never look at regular cabinets the same. It’s not just storage. It’s a centerpiece.
You’ll pour your first drink from it and grin. You’ll watch guests walk straight to it, running their hands along the wood, asking how you built it. You’ll tell the story — the cutting, the sanding, the varnish — and every scratch in the wood will feel like part of your own memory.
It’s furniture, sure. But it’s also history, craftsmanship, and a little bit of pride rolled into one.
DIY vs Ready-Made
Building your own barrel bar? Rewarding. Sawdust in your hair, sore arms, and a bar you can point at proudly.
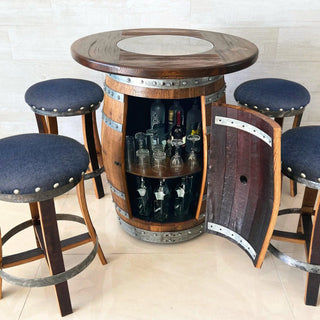
But hey, not everyone wants to wrestle oak and power tools. If you’d rather skip the workshop, Oak Wood Wine Barrels offers handcrafted pieces like the whiskey barrel cabinet with stemware holder, the bourbon wine barrel cabinet with door storage & shelf, and the museum bourbon wine barrel cabinet. Same rustic magic, minus the splinters.
Our Links
- Whiskey barrel cabinet with stemware holder
- Bourbon wine barrel cabinet with door storage & shelf
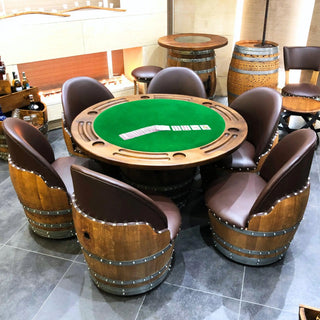
- Oak barrel pub table set with cabinet storage
Other Resources to Check Out!
Disclaimer
This guide is here to inspire and inform — not to act as a professional woodworking manual. Every barrel is different. Some are tight and solid, others dry and fragile. Cutting into oak and working with curved staves comes with risks.
Always reinforce your barrel with screws, rivets, or bolts before cutting. Always wear protective gear — goggles, gloves, dust mask. Work slowly. Don’t rush. And never use tools you’re not comfortable with.
Oak Wood Wine Barrels shares these steps in the spirit of creativity and craftsmanship, but we cannot guarantee your safety or the outcome of your project. If you’re unsure, grab a pro — or check out our professionally made barrel bars.
Most importantly: enjoy the process. Building a barrel bar isn’t just about the end result. It’s about the satisfaction of shaping something old into something new. And when you finally pour that first drink from your creation, you’ll know it was worth every cut, screw, and splinter.