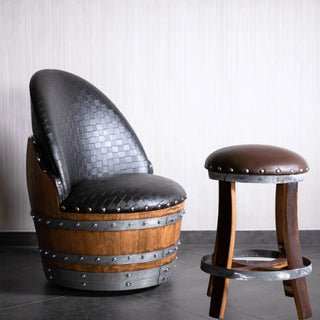
A basement bar zones layout works because most finished basements are too long and too narrow for one giant room to feel right, but they break naturally into three functional areas. The drinks station handles preparation and pouring; the lounge area handles sitting and conversation; the entertainment zone handles screens, games, or listening. Each zone has its own clearance requirements, lighting needs, and ideal furniture footprint. After helping customers plan layouts around 1,527-plus barrel bars our family workshop has shipped, the 3-zone breakdown is the single layout request we see most often. This walkthrough is part of our larger basement bar layout series, which starts with our 11 basement bar layouts overview post. For built-around-a-barrel options to anchor the drinks zone, our barrel bar collection is here.
Time required: 1-2 evenings of planning + a weekend to mark out and rearrange. Skill level: Beginner planning; intermediate if you're also running electrical.
Tools and materials for planning
| Tool | Purpose |
|---|---|
| Tape measure (25 ft) | Room and furniture dimensions |
| Painter's tape | Mark furniture footprints on the floor |
| Graph paper or floor plan app | Sketch zones to scale |
| Cardboard or large paper | Mock furniture footprints before buying |
| Stud finder | Mark walls for sconces, screens, or shelves |
| LED string lights (optional) | Test ambient zone lighting before final installation |
Step 1. Measure the full space and identify fixed obstacles
Measure the basement to the inch, including ceiling height, beam locations, support columns, mechanical room doors, water heater closets, sump pump locations, and electrical panels. Mark all of these on a graph-paper sketch. The zones will form around these fixed elements, not in spite of them.
The two ceiling heights that matter most: 7 feet (the practical minimum for a bar zone where people stand) and 7 feet 6 inches (comfortable for stools at counter height). If you have a beam running across the room at 6 feet 8 inches, plan the lounge zone (seated) under the beam, not the bar zone (standing).
Step 2. Plot traffic flow before placing zones
The stairs are the single most important fixed element. Every person entering the basement uses them, so the path from the bottom of the stairs to each zone must remain clear. Standard guidance: a 36-inch traffic lane from the stair landing across the room, and 30 inches around any furniture that sits along the path.
Mark the traffic lane in painter's tape on the floor. This is the only step that can't be skipped. Furniture placed in the traffic lane will be the first thing to feel wrong six months after install, and the hardest to fix.
Step 3. Place Zone 1: the drinks station: first
The drinks station has the most constraints, so place it first and let the other two zones work around it. Constraints include: proximity to water (if you want a working sink), proximity to an outlet for refrigeration or ice production, ventilation if you plan to serve cigars or use a smokeless ashtray (these still produce heat), and back-bar wall space for bottle display.
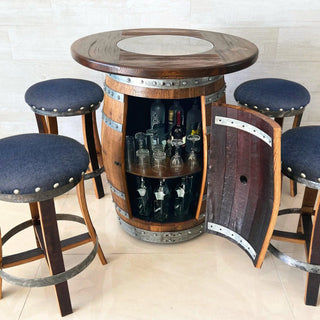
The optimal location is usually against the longest unobstructed wall, with the bar countertop projecting out 30-36 inches from the wall. A full barrel bar built around an authentic 53-to-59-gallon Bordeaux barrel projects roughly 27-30 inches and needs another 24 inches of bartender clearance behind it, so plan a minimum 54-inch footprint depth for the drinks zone.
If you're running plumbing for a working sink, the drinks zone should sit near the existing supply and drain stack to minimize the run. Adding 20 feet of plumbing is doable but adds cost and visible pipework.
Step 4. Establish bar stool and back-bar spacing
Standard counter-height bar stools (24-26 inch seat) and bar-height stools (29-30 inch seat) need 24 inches of horizontal space each at the bar, with 12 inches between centers for elbow room. For a 5-foot barrel bar (typical for a single-barrel build), plan 2-3 stools maximum.
The back-bar (bottle display, glassware shelves, optional mirror) sits 36-42 inches behind the front of the bar, leaving room for the bartender to work. If you don't have a dedicated bartender, this space can collapse to 24 inches and the back-bar can hang directly on the wall.
[Source: De Chiara, Panero, and Zelnik, "Time-Saver Standards for Interior Design and Space Planning" (McGraw-Hill), residential bar and seating dimensional standards; Human Dimension & Interior Space anthropometric data on counter and stool clearances.]
Step 5. Place Zone 2: the lounge: for conversation
The lounge zone is for sitting and talking. Two design principles: every seat should be able to see every other seat without turning more than 90 degrees, and the conversational distance between seats should be 4-8 feet (closer feels intimate, further feels strained).
The most common lounge configurations:
- L-shape sectional + accent chair: Best for narrow basements; the sectional anchors the long wall and the chair faces in.
- Two sofas facing each other: Best for square spaces with 14+ feet of width; a coffee table sits between.
- Three-piece conversation pit: Two chairs and a sofa at 120-degree angles around a circular table; best for irregular spaces with off-center support columns.
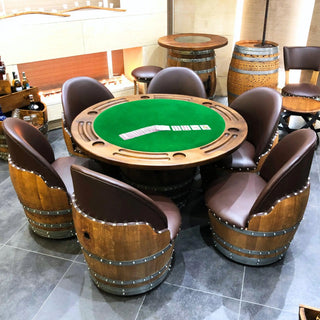
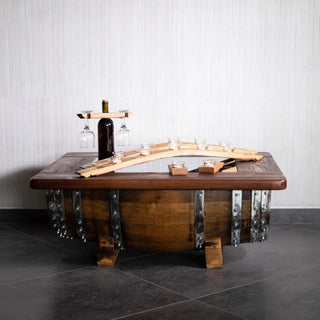
A wine barrel cocktail table works well in any of these because the round footprint reads as a focal point regardless of how the seating is angled around it. Build the lounge around the table, not the other way around.
Step 6. Place Zone 3: entertainment: last and at distance from the bar
The entertainment zone (screen, projector, listening setup, games table) goes last because its placement is the most flexible. It should sit far enough from the drinks zone that conversation at the bar doesn't compete with audio from the screen, typically the opposite end of the room or behind a partial divider.
A few entertainment configurations:
- Wall-mounted TV with the lounge as audience: Most common; mount the TV 42-50 inches from floor to bottom of screen, viewing distance 1.5-2.5x screen diagonal.
- Projector and pull-down screen: Best for the longest viewing wall; clear projector throw distance and avoid ambient light from the drinks zone.
- Games table (pool, poker, shuffleboard): Need at least 5 feet of clearance on all sides of the table for cues or seats pulled back; this is the most floor-hungry option.
If you have only 200-300 square feet to work with, you may need to combine the lounge and entertainment zones, a sofa facing the TV serves both functions. The 3-zone layout works best in basements over 350 square feet of finished space.
Step 7. Plan lighting per zone
Each zone needs its own lighting layer, not a single overhead fixture for the whole room.
Drinks zone: Task lighting under the back-bar shelves (LED strip or puck lights), plus 2-3 pendants at 32-36 inches above the bar countertop. Color temperature 2700K-3000K (warm). Avoid overhead recessed cans directly over the bar, they cast shadow into the bartender's prep area.
Lounge zone: Ambient layer (wall sconces or table lamps), no overhead direct light. Color temperature 2700K. Add a dimmer switch, this is the only lighting in the basement that needs to be variable.
Entertainment zone: No direct light on the screen. Bias lighting behind the TV (a single LED strip mounted to the back of the TV reduces eye fatigue). For projector setups, kill all direct light during use.
[CHART: Floor plan diagram showing zone placement, traffic lane, and lighting positions]
Step 8. Run electrical and audio before finishing the floor or walls
If your basement is unfinished or under renovation, this is the order: plan the zones, mark all outlet and switch locations, run electrical and any in-wall audio, then finish floor and walls. If your basement is already finished, surface-mount conduits in baseboard channels are the lowest-impact retrofit.
Outlets needed per zone:
- Drinks zone: 4-6 outlets within 6 feet of the bar (refrigeration, blender, ice maker, sound system, accent lighting, phone charging)
- Lounge zone: 2-3 outlets per wall (table lamps, charging, accent lighting)
- Entertainment zone: 4-6 outlets behind the screen wall (TV, AVR, streaming devices, game consoles, projector if applicable)
Add a single 20-amp dedicated circuit for the drinks zone if you plan a beverage fridge plus ice maker plus blender, combined draw exceeds a standard 15-amp circuit.
[Source: National Electrical Code (NEC / NFPA 70), Article 210 on branch-circuit requirements and dedicated 20-amp circuit guidance for small-appliance loads.]
[Source: Illuminating Engineering Society (IES), "The Lighting Handbook" (10th edition) on layered residential lighting design and color temperature recommendations for hospitality spaces.]
Step 9. Acoustic considerations between zones
Basements amplify sound because of the hard surfaces, concrete floor (even when finished), drywall ceiling, glass on the screen wall. Without acoustic treatment, conversation in the lounge competes with the TV and the bar both ways.
Quick wins: an area rug in the lounge zone (8x10 minimum), drapery on any window walls, a fabric or wool wall hanging in the entertainment zone behind the seating. These three additions cut perceived noise by 40-60 percent at low cost.
We cover this in more depth in our home bar acoustic treatment guide, the principles apply equally to basements.
Common mistakes when planning a 3-zone basement bar
Mistake 1: Placing the drinks zone at the far end of the room from the stairs. Guests crowd the entry and never make it to the bar. Place the drinks zone within 12-15 feet of the stairs.
Mistake 2: Skipping the painter's-tape mockup. Furniture catalog dimensions feel different in person. Tape out every piece before ordering.
Mistake 3: One overhead light for the whole basement. Three zones need three lighting layers, minimum.
Mistake 4: TV directly across from the bar. Audio from the entertainment zone competes with conversation at the bar. Place the entertainment zone at 90 degrees or behind a partial divider.
Mistake 5: Forgetting the cigar-and-heat problem. If anyone in your circle smokes cigars, plan ventilation in the entertainment or lounge zone, never in the drinks zone where smoke contaminates pours.
Mistake 6: Using outdoor-rated barrel furniture indoors or letting indoor barrel furniture into uninsulated garage spaces. Authentic wine barrel furniture is indoor-only in conditioned space. A finished, climate-controlled basement is ideal.
Quick recap
Plot traffic flow first. Place the drinks zone against the longest unobstructed wall near plumbing and outlets. Place the lounge for 4-to-8-foot conversational distance. Place the entertainment zone at distance from the bar with controlled lighting. Three lighting layers, not one. Tape it out before you order.
For more layout walkthroughs, the 11 basement bar layouts post covers specific room shapes; for the bar-anchor piece itself, browse our barrel bar collection.